-
[ios - Swift] UITableView Section DataSource 알아 보기ios 2020. 11. 19. 12:00
이번엔 UITableView Section에 대해 알아보겠습니다.
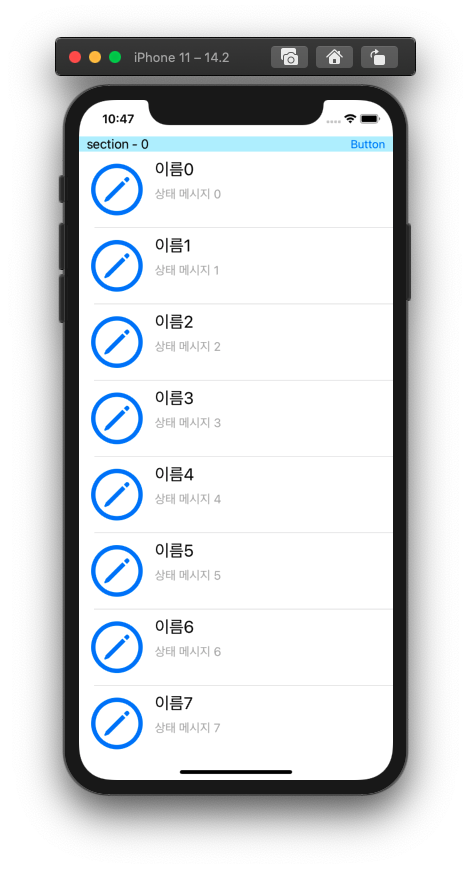
우선 Section 은 아래의 이미지처럼 관련된 로우를 구분 지어 구역으로 나누는 것으로 생각하시면 될 것 같습니다.

이제 UITableViewDataSource의 Section 관련 함수들을 하나씩 살펴보겠습니다.
1. NumberOfSections
테이블에서 보일 섹션의 수를 반환합니다.
func numberOfSections(in tableView: UITableView) -> Int {
    return 4
}
return 값을 4로 설정하니 타이틀 없이 Section이 생긴 것을 확인할 수 있습니다.
그럼 이제 Section의 타이틀을 추가해보도록 하겠습니다.
2. titleForHeaderInSection, titleForFooterInSection
Header와 Footer의 타이틀을 설정합니다.
func tableView(_ tableView: UITableView, titleForHeaderInSection section: Int) -> String? {
    return "Header - \(section)"
}

func tableView(_ tableView: UITableView, titleForFooterInSection section: Int) -> String? {
    return "Footer - \(section)"
}


각각 적용한 모습과 동시에 적용한 모습을 확인할 수 있습니다.
그런데 Header 또는 Footer만 적용한 이미지를 확인해 보면 Section Title이 없어도 빈 공간이 생기는 것이 보이는데 이를 없애보도록 하겠습니다.
3. heightForHeaderInSection, heightForFooterInSection
func tableView(_ tableView: UITableView, heightForHeaderInSection section: Int) -> CGFloat {
    return 0
}


func tableView(_ tableView: UITableView, heightForFooterInSection section: Int) -> CGFloat {
    return 0
}


Header, Footer의 Title을 지정했더라도 Section이 사리지는 것을 확인할 수 있습니다.
지금까지 Section Title을 넣는 것을 알아봤는데 이제 타이틀 대신 UIView를 넣어 배경색이 다른 Section을 만들어 보도록 하겠습니다.
4. viewForHeaderInSection, viewForFooterInSection
func tableView(_ tableView: UITableView, viewForHeaderInSection section: Int) -> UIView? {
    let view = UIView(frame: CGRect(x: 0, y: 0, width: tableView.frame.width, height: 30))

    view.backgroundColor = .yellow

    return view
}

func tableView(_ tableView: UITableView, viewForFooterInSection section: Int) -> UIView? {
    let view = UIView(frame: CGRect(x: 0, y: 0, width: tableView.frame.width, height: 30))

    view.backgroundColor = .red

    return view
}
ImageView 사용 / addSubview 로 인터페이스 추가한 모습 이렇게 UIView를 Section으로 삽입하는 게 가능하고 addSubview를 사용해 라벨, 버튼등 인터페이스를 추가해 사용할 수 있습니다.
5. Section 고정 풀기

Section을 사용하다 보면 위 이미지처럼 Header가 상단에 고정되어있는것을 확인할 수 있습니다.

이것을 해제하려면 Attuributes inspector -> Table View Style -> Grouped 설정하면 됩니다.
'ios' 카테고리의 다른 글
[ios - Swift] RefreshControl 사용하기 (0) 2020.11.22 [ios - Swift] UITableView Swipe Button 만들기 (0) 2020.11.20 [ios - Swift] UITableViewCell을 Xib로 만들기 (UITableView 2/2) (0) 2020.11.18 [ios - Swift] UITableView CustomCell 만들기 (UITableView 1/2) (0) 2020.11.17 [ios - Swift] Swift Timer 사용 (0) 2020.11.16