-
[ios - Swift] 카메라, 앨범 권한 설정ios 2020. 12. 1. 20:00
오늘은 카메라 및 사진 권한 설정 및 사용방법에 대해 알아보도록 하겠습니다.
1. info.plist

카메라와 앨범에 접근할 수 있도록 권한을 요청합니다. value 에는 보여주고 싶은 말을 적어주시면 됩니다.
2. 권한 요청
override func viewDidLoad() {
    super.viewDidLoad()

    imagePickerController.delegate = self

    // 앨범
    PHPhotoLibrary.requestAuthorization { (state) in
        print(state)
    }
}
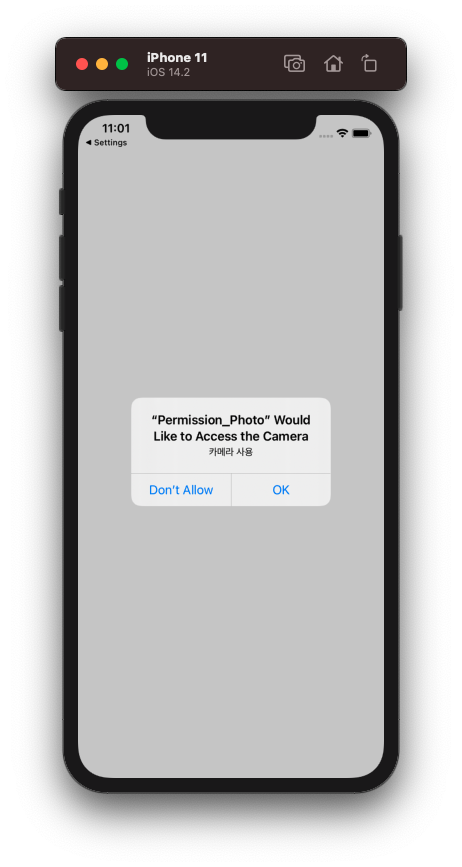
override func viewDidLoad() { super.viewDidLoad() imagePickerController.delegate = self // 카메라 AVCaptureDevice.requestAccess(for: .video) { (result) in print(result) } }카메라 및 사진 앨범에 대한 권한을 요청한 후 결과를 확인해보면 아래와 같습니다.


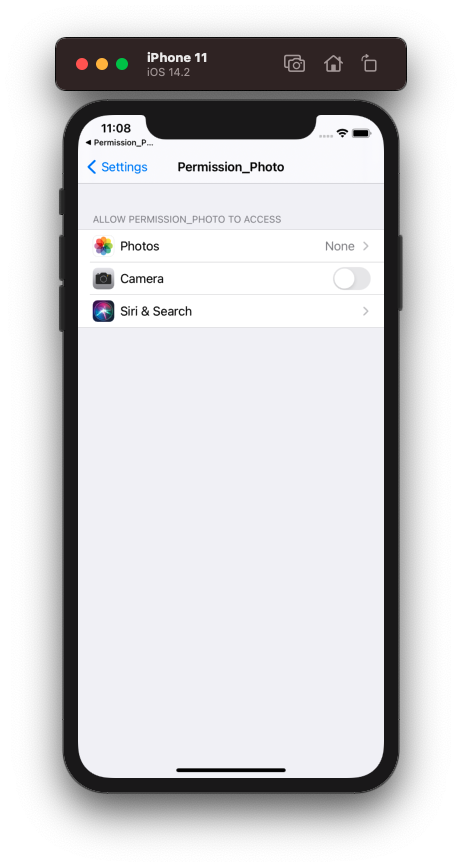
하지만 사용자가 한번 거부를 하거나 앱 설정에서 접근 권한을 바꾼다면 위에 카메라와 앨범을 사용할 수 없기 때문에
카메라 또는 사진 앨범을 실행 시 권한을 체크해서 재요청 가능하도록 처리해보도록 하겠습니다.

사진과 같이 카메라와 앨범에 대한 권한을 끄도록 하겠습니다.
버튼 이벤트 설정
let imagePickerController = UIImagePickerController()

@IBAction func Camera_Click(_ sender: Any) {
    if CameraAuth() {
        self.imagePickerController.sourceType = .camera

        self.present(self.imagePickerController, animated: true, completion: nil)
    } else {
        AuthSettingOpen(AuthString: "카메라")
    }
}

@IBAction func Library_Click(_ sender: Any) {
    if PhotoAuth() {
        self.imagePickerController.sourceType = .photoLibrary
        self.present(self.imagePickerController, animated: true, completion: nil)
    } else {
        AuthSettingOpen(AuthString: "앨범")
    }
}
권한 요청
extension ViewController: UIImagePickerControllerDelegate, UINavigationControllerDelegate {
    func PhotoAuth() -> Bool {
        // 포토 라이브러리 접근 권한
        let authorizationStatus = PHPhotoLibrary.authorizationStatus()

        var isAuth = false

        switch authorizationStatus {
        case .authorized: return true // 사용자가 앱에 사진 라이브러리에 대한 액세스 권한을 명시 적으로 부여했습니다.
        case .denied: break // 사용자가 사진 라이브러리에 대한 앱 액세스를 명시 적으로 거부했습니다.
        case .limited: break // ?
        case .notDetermined: // 사진 라이브러리 액세스에는 명시적인 사용자 권한이 필요하지만 사용자가 아직 이러한 권한을 부여하거나 거부하지 않았습니다
            PHPhotoLibrary.requestAuthorization { (state) in
                if state == .authorized {
                    isAuth = true
                }
            }
            return isAuth
        case .restricted: break // 앱이 사진 라이브러리에 액세스 할 수있는 권한이 없으며 사용자는 이러한 권한을 부여 할 수 없습니다.
        default: break
        }

        return false;
    }

    func CameraAuth() -> Bool {
        return AVCaptureDevice.authorizationStatus(for: .video) == AVAuthorizationStatus.authorized
    }


    func AuthSettingOpen(AuthString: String) {
        if let AppName = Bundle.main.infoDictionary!["CFBundleName"] as? String {
            let message = "\(AppName)이(가) \(AuthString) 접근 허용되어 있지않습니다. \r\n 설정화면으로 가시겠습니까?"
            let alert = UIAlertController(title: "설정", message: message, preferredStyle: .alert)

            let cancle = UIAlertAction(title: "취소", style: .default) { (UIAlertAction) in
                print("\(String(describing: UIAlertAction.title)) 클릭")
            }
        }
        let confirm = UIAlertAction(title: "확인", style: .default) { (UIAlertAction) in
            UIApplication.shared.open(URL(string: UIApplication.openSettingsURLString)!)
        }

        alert.addAction(cancle)
        alert.addAction(confirm)

        self.present(alert, animated: true, completion: nil)
    }
}
'ios' 카테고리의 다른 글
[ios - Swift] Foreground Push 알림 사용 (UNUserNotificationCenter 2/2) (0) 2020.12.06 [ios - Swift] Push 알림 사용하기 (UNUserNotificationCenter 1/2) (0) 2020.12.06 [ios - Swift] Delegate를 사용해서 뷰에 데이터 전송하기 (0) 2020.11.30 [ios - Swift] 키보드 사용시 뷰 올리기 (0) 2020.11.26 [ios - Swift] UITableView 특정 위치로 이동 (0) 2020.11.26